


Behind the Scenes of Fever Dream: November
Belated post (expect another one-- thanks to Mike, who has challenged me to get back into writing more), but I wanted to show my process for making my props/art for this month's show I co-run.

Step 1: Invocation of the Muse (Instagram close friends story post)

I feel like it’s incorrect to romanticize the way that most of my sets (whether straight stand-up or something with more props/accessories involved) come to be, but I have always liked the concept of the muse. There’s a little bit of truth in the way that the appropriate lens with which to view parts of my life and turn them into a story always seems to fall down when I least expect it. Maybe it’s just helpful to give myself the virtual equivalent of sticky-notes.
Step 2: Sketching
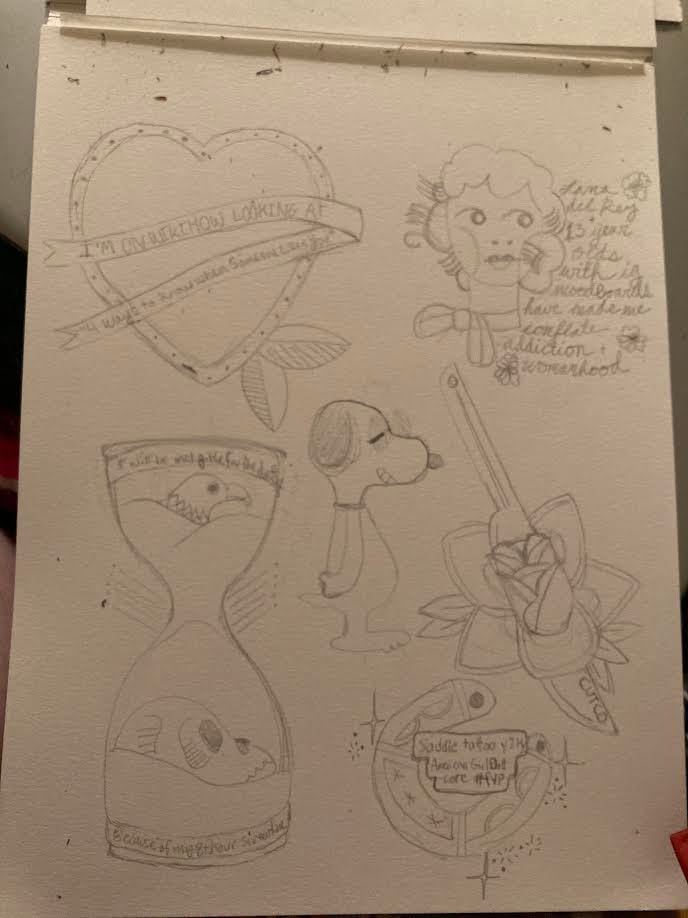
I really do like to design American Traditional tattoos. There’s a humor in them I find appealing. To an extent, I let the page set my parameters for the length of my set: six tattoos are as much as I could fit in, so I know that I’ll be confining my subject matter more or less to these. Because I wanted an interactive experience with this set, I wanted to cast a wide net for subject matter. I try to blend niche with something lots of people can take to heart. Also, note the Snoopy— not only is he a staple in American Traditional design, but he’s so universally beloved that I figured he’d be a good button to close out with.
Step 3: Coloring
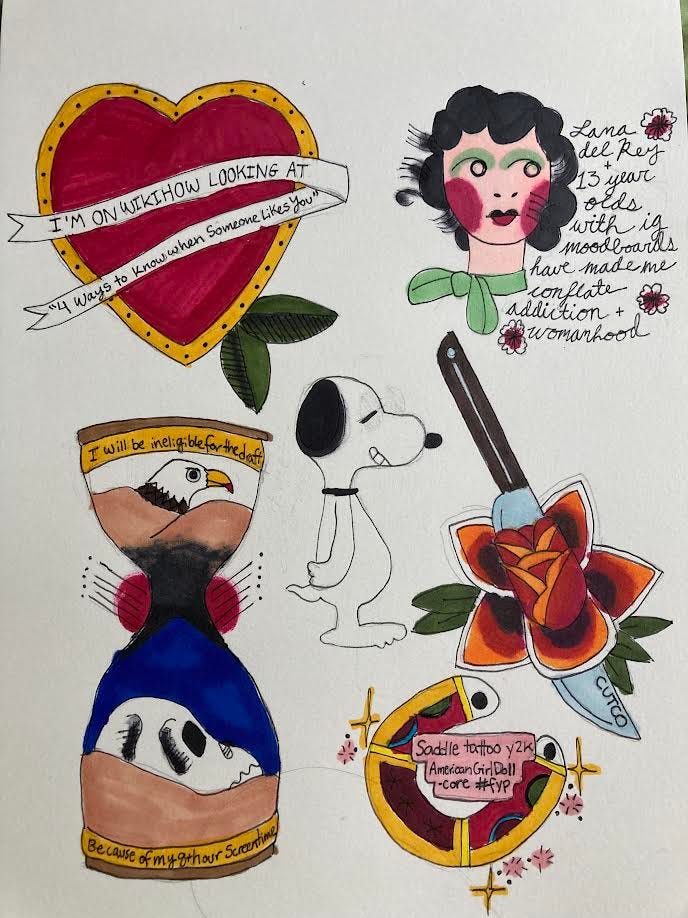
In order to trace and color these, I used regular American Traditional flash for reference (usually, artists will use ink and watercolor, and I only had pens and the most raggedy, three-year-old markers in the world, but I was still able to achieve the kind of blending I wanted). For the PowerPoint I made to accompany this set so that others besides the tattoo recipients could see them, I took scans of each of the drawings.
Step 4: Cutting Out
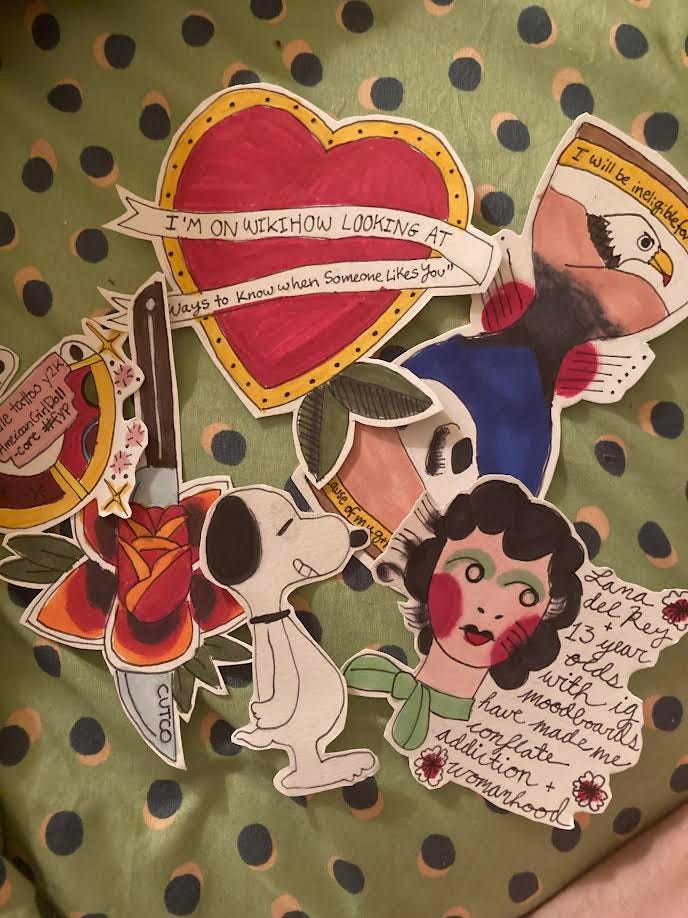
I have a set of fabric scissors that I’ve destroyed by using them on everything, so they help me out with scissors too. For the sake of this project, I wanted them to look more like stickers than actual transparent tattoos. Something I like about Fever Dream is that I think it allows for a space where DIY feeling is encouraged. It’s not to say that I don’t have an intense amount of perfectionism in most of the things that I do (see: the eraser shavings in the sketching photo), but I also have a deep fondness for things that are visibly homemade. I think the best comedy and art carries that vulnerability with it. An exacto knife probably would have worked better, but I’m pleased with the results (besides, the DIY sticker tutorial I use covers them all in a layer of duct tape, so it’s okay if the edges are nicked in some places).
Step 5: Make Stickers
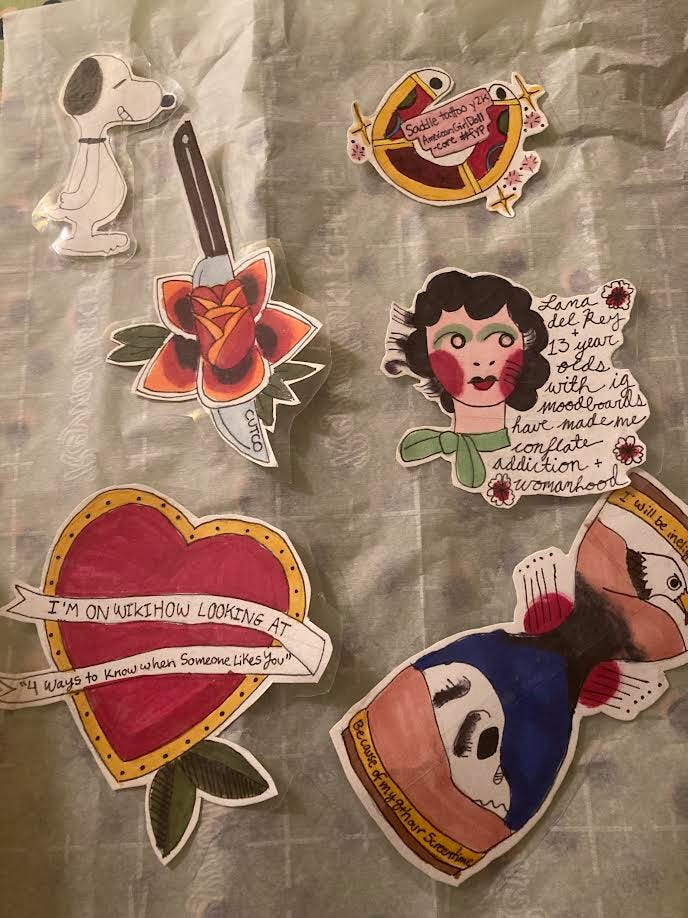
The sticker method I use involves making a layer of duct tape on parchment paper, placing your cut out image above it, and then adding another layer. When you trim around the duct tape in the shape of the illustration, you wind up with a sticker you can peel off and place on anything! It’s pretty sturdy if you get good tape. For the show, I knew it was cold enough outside that most people would have long sleeves. Because of this, I didn’t have to worry about putting duct tape on anyone’s arm/leg hairs.
I did not get a video of the show (I was kind of tipsy and my phone fell from the position I had propped it up in), but the good news is that I have scans of the drawings, so I can always make more stickers and try out the process again.